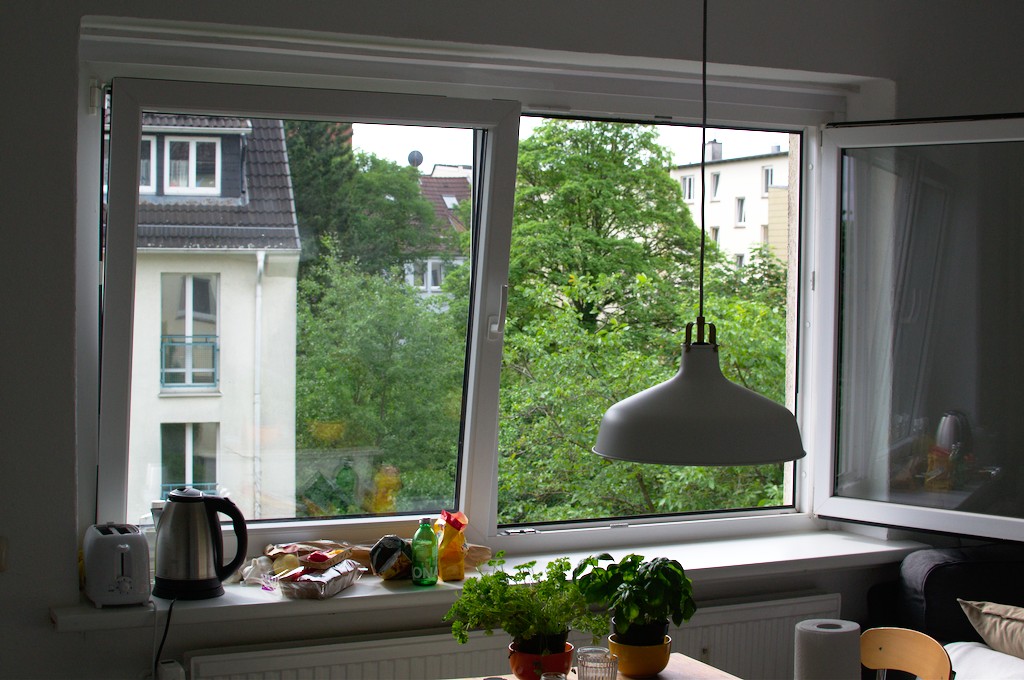
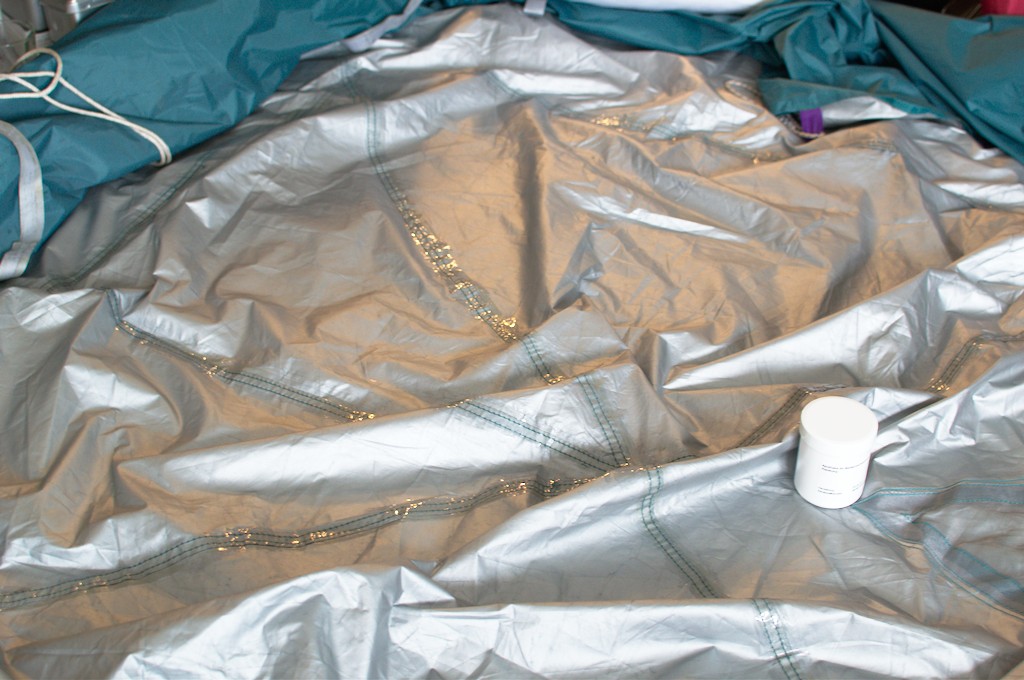
About a week ago I borrowed a tent from my parents because I had the plan to do a short bicycle tour to the Baltic Sea this week. The weather was really nice this weekend so I decided to try out the tent, which is a Ferrino Makalu III, at least according to the bag in which it came. (All images I could find of it on the web look different. But it is quite similar to the Frilufts Barry 3.)
When I arrived at the campsite and erected the tent I quite soon found out that the seam-sealing tape on the inside of the outer tent had come off almost everywhere. Naturally the tent was also completely soaked the next morning due to all the dew, so I figured I had to reseal the seams and waterproof the tent. So here are some instructions.
How to seal the seams
Step 1: Buy some stuff
If you have a polyurethane coated tent, you will need the following:
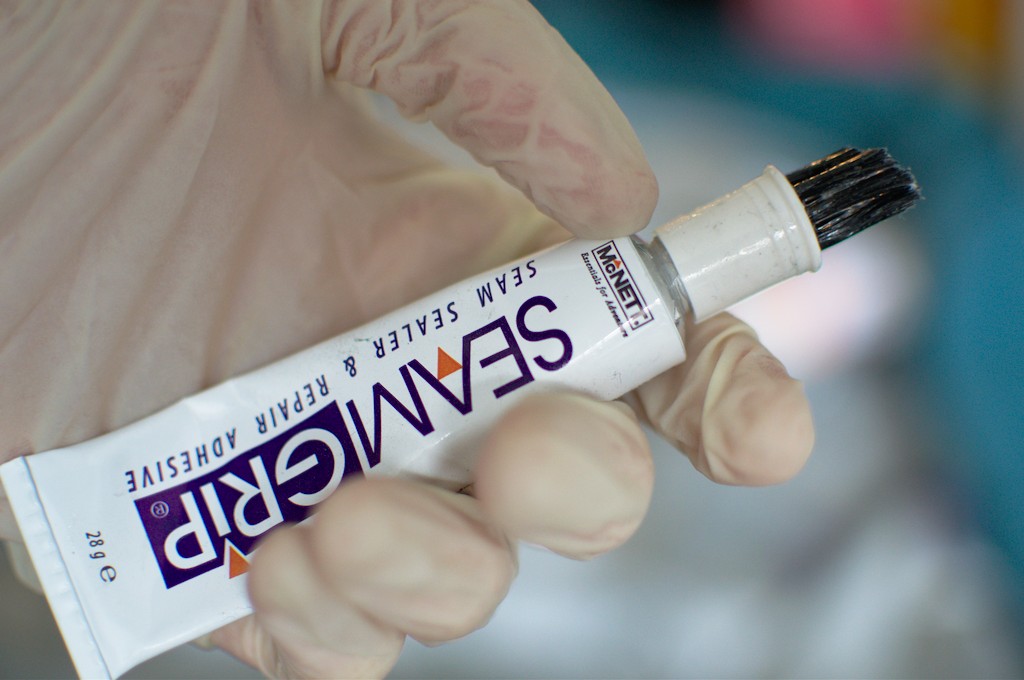
One or two tubes of McNett SeamGrip (specialized outdoor store). I figured 28ml are enough for roughly 8 meters of seam.
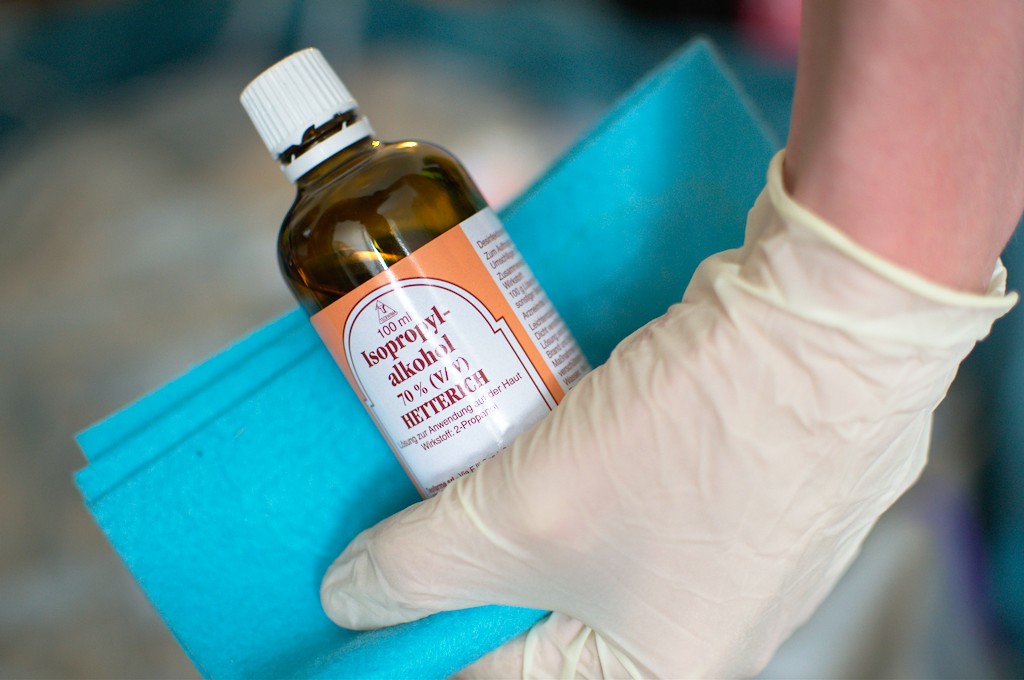
ca. 50ml isopropyl alcohol in a 70% solution (pharmacy, drugstore)
ca. 20g talcum powder (pharmacy)
A rug
Couple of rubber gloves
Concerning Silicon/Nylon tents, I have no clue, sorry! Anyway, all of this cost me around 30€. Less than a new tent, but still not too cheap. I hope it will be worth the effort.
Step 2: Prepare!
I can’t really seal all of the tent at once in my small room, so I had to do this a couple of times: Open - the - windows. The stuff in the tube stinks. And be prepared to leave the windows open for two hours at least. It takes around eight hours before the seams are completely dry again.
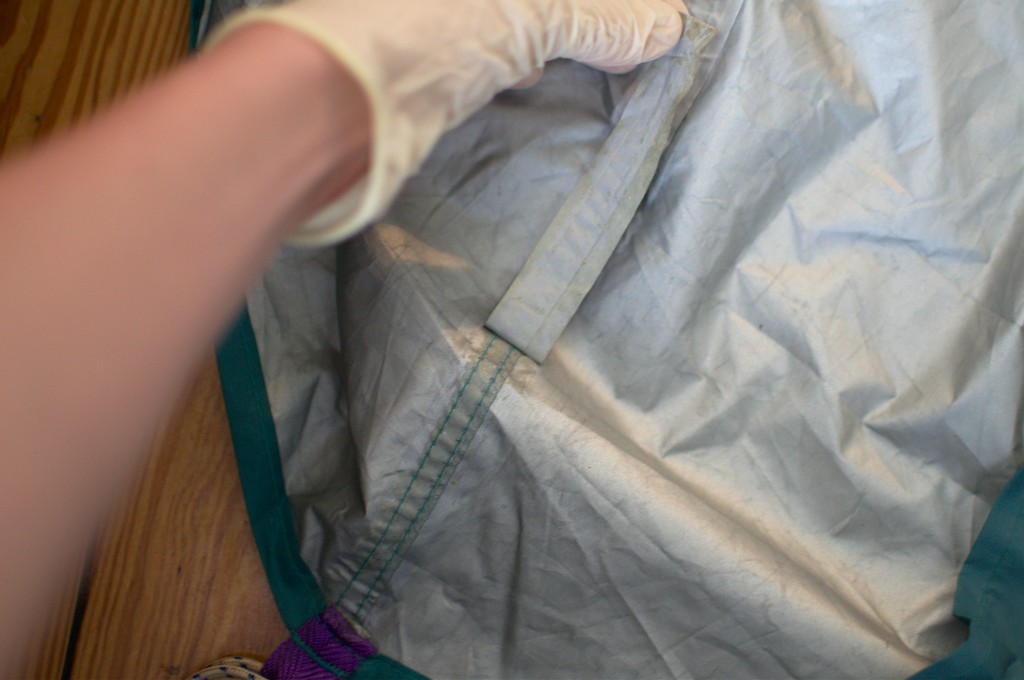
Step 3: Clean the seams
Lay out the portion of your tent which you want to seal on an even surface, and remove the “sealing” tape where it hasn’t come off already.
Put on the rubber gloves now. Then make sure the seams are clean, soak a part of the rug in isopropyl alcohol and rub it into the seams which you are about to seal.
Step 4: Apply the sealing gel
The gel comes in a tube with an optional brush applicator. Use the applicator if you are going to spend all of the tube at once. Otherwise, I figured it was a pretty bad idea. The applictor has a tiny hole inside which is supposed to let the gel through - which will be sealed, i.e. useless overnight. Just use the tube directly and then spread the gel using the brush.
Apply the gel to roughly the same area as the tape had before.
Step 5: Go do something else for the next 8 hours
Preferably outside of the room in which the tent is drying.
As you can see in the picture, the seams are shiny after using the gel.
Step 6: Put the white powder to good use
When the seams are dry (you can find out with a careful touch whether it is still sticky), use the talcum powder. Now be aware that this stuff can give you cancer, so the best idea is not to inhale it. The talcum is necessary so the sealed seams won’t stick to each other when you fold the tent. Apply small amounts to the sealed seams with your finger, and they will be rendered matte and not stick to each other any longer. If you spilled the powder, use a wet rug to clean it. Shaking it off is probably not the best idea.
How to waterproof the tent
I haven’t done this yet, but according to the packaging of the waterproofing spray it is as easy as erecting the tent on a dry day and spraying it. Maybe a rug to spread the liquid could come in handy.
I am a University student, and at University sometimes I see myself forced into utterly insensible conventions.
Case in point: The electrical engineering module which I currently attend. The convention is to draw logic gates according to a standard which has been abandoned since the 1970s, and it is called “DIN 40700.” The logic gates look generally fairly similar to the currently used US logic gates, but some of them are completely different.
I usually do my homework in LaTeX, so naturally I tried out CircuiTikZ. CircuiTikZ is a LaTeX package for drawing electric circuits, it is possible to use the US logic gates as well as the European ones, but not the old DIN gates, so I wanted to find a way to implement them.
I did, and here you can download the result, with some installation instructions: circuitikz-german-logic. I am most welcome to your issues and pull requests, because I only tested this on one configuration (Arch Linux with TeXLive/XeLaTeX).
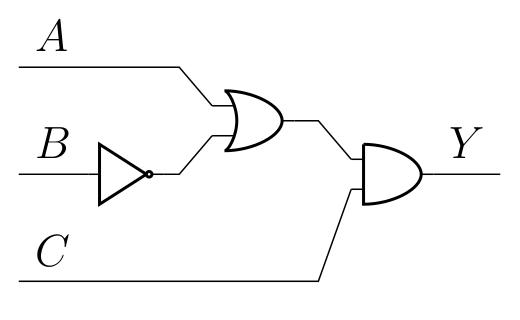
Before (US gates)
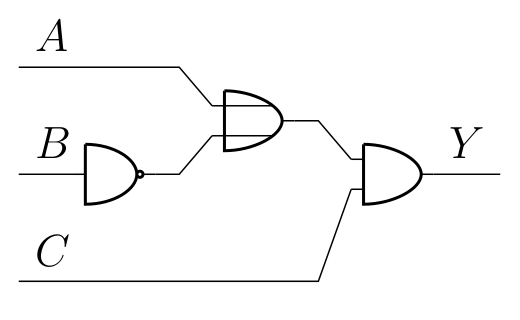
After (DIN 40700 gates)
Small explanatory note: The leftmost gate is a not gate, the middle gate is an or gate, and the rightmost gate is an and gate, respectively.
How it works
I will focus on the or gate for the sake of this article. It seemed sensible to just take the and gate, and modify it a bit so that it looks like the German or gate.
The and gate is defined in pgfcirctripoles.tex in the lines following the declaration \pgfdeclarelogicport{and}. What we find in the body of the definition are a set of commands for PGF, which is a LaTeX macro package for creating graphics. The layout of the and gate is basically a sequence of moveto, lineto, and curveto commands, and structurally, it consists of:
The upper input port
The lower input port
The output port
The left part (straight line) of the gate
The lower part of the curve
The upper part of the curve
So what we should focus on are the upper (1) and lower (2) input ports. After replacing a couple of variables, the source code reads like this:
After a grep of the source directory, it turns out that port_width is 0.7 and input_height is 0.5, and therefore the thing draws a horizontal line from (-1,0.5) to (-0.7,0.5), and the same line one height unit below again.
I just copied this part, renamed the gate, and modified the code above so that it looks like this:
I decided by now that I want to spend some time in my life reading books, the old-fashioned way. I have read books in the past, mostly books for adolescents, not to mention a bunch of fantasy and some science-fiction novels, but I only recently discovered that my score on most Top 100 books lists I can find on the omniscient Internet is below five. A limiting factor might be that my native language is not English, but that aside, I have four languages to care about, and I don’t get more than ten out of a hundred anywhere else either.
So I said to myself, well, if there are so many books out there which are supposed to be more interesting than most stuff I’ve read so far – and I have always enjoyed reading books – starting one of those lists, one book by one, will probably be a lot of fun.
This week I decided to start with the ‘ultimate list,’ a list compiled by Medium author Joel Patrick. Three of the books mentioned there I have already completed:
George Orwell, 1984 (13)
Aldous Huxley, Brave New World (18)
Douglas Adams, The Hitchhiker’s Guide to the Galaxy (46)
Therefore, the first book I will read is F. Scott Fitzgerald’s The Great Gatsby, and I will let you know what I think about it when I’m done.
On September 3, I was hanging around in the #archlinux-offtopic IRC channel, and when chee came up with the idea to make a Linux program which would print a random imgur link, I asked for more fascinating ideas like that one. I think I might actually realize that first idea at some point, but I’ll save that for later. Anyway, chee also pointed me to this script simply called bullshit, originally written as part of the exotic 9front operating system, and I wanted this on my system, so I figured I might as well port it. Here is what it does:
$ bullshit
managed virtual API out-scaling backend
Bullshit’s original source code was written for the Plan 9 shell called rc, but the script really mostly consists of a 50-line awk command, which I could obviously keep without modification, while the remaining five lines were one line of shebang, and four lines of setting a variable. That was quite easily ported, the script now looks like this, I installed this locally, had some fun, and from then on the whole thing remained largely untouched for a couple of weeks.
Some weeks later I was at a local chaos gathering, and after talking for a while about all kinds of silly programs, a guy who goes by the handle of djerun (who was running Arch Linux as well) also wanted this script. So this was when I created an Arch Linux package for the first time in my life.
Writing an Arch Linux package can be quite straightforward. I found some unrelated PKGBUILD in a remote corner of my file system, copied it over to my source directory, put the two source files needed for bullshit into a subdirectory called src, and then edited the file so that it looked like this. I changed the pkgname, added a more or less sensible pkgdesc, changed the url, and replaced the install command of the old PKGBUILD with two for my new files. You can really tell from the first line that this was really just a quick hack done without much sophistication. Mind you, I should have done this differently.
So I uploaded this to github, and everything was fine, djerun got the package and everyone was happy, or maybe not everyone, but at least the both of us.
Except the next afternoon I resolved making this package available for everyone in the Arch Linux AUR.
Of course I had to rework the PKGBUILD file. Most of it was pretty easy. In this particular case, I could not find any sensible license for this script. I saw that some of 9front has been licensed under GPL v2, so I made GPL v2 happen. The other licenses floating around in the atmosphere of that operating system, by the way, have been quiteawkward. Anyway, my PKGBUILD now looked like this:
# Maintainer: Fabian Schmidt <fceschmidt at posteo dot de>pkgname=bullshit
pkgver=0.0
pkgrel=1
pkgdesc="Assemble a stream of technology bullshit from words in a file"arch=('any')url="https://github.com/fceschmidt/bullshit-arch"license=('GPL2')depends=('gawk')source=('https://raw.githubusercontent.com/fceschmidt/bullshit-arch/master/src/bullshit.tar.gz')md5sums=('70f68f9ae1758f4e7677b2a5d141ee7b')
package(){
install -Dm755 $srcdir/bullshit "$pkgdir/usr/bin/bullshit"
install -Dm644 $srcdir/bullshit_lib "$pkgdir/usr/lib/bullshit"}
You can see what changed compared with the first draft. Really, if you are trying to get something into the AUR, it is still a fairly simple process, but it is good to read up about the requirements before you start. I already had a repository for this project. That was a mistake. The two major mistakes I made were these:
I put my sources into a subdirectory of the repository root. Do not do this, your package will be automatically rejected.
I did not have a .SRCINFO file in every single commit in my history.
The way to go about creating a package in the AUR is different from what I had thought: You don’t put the PKGBUILD into the same repository as your sources, no matter how big they are. As far as the AUR is concerned, you create the PKGBUILD, and that’s about it. Inside the PKGBUILD, you get your sources from a tarball hosted somewhere else. You validate the contents against an MD5 checksum. And then, the files are automatically extracted into the src subdirectory, and the rest of the process works just as before.
So I created a new repository and tried my best to do everything right from the beginning this time around. And now you can also have bullshit on your system!
You’ll find this post in your _posts directory. Go ahead and edit it and re-build the site to see your changes. You can rebuild the site in many different ways, but the most common way is to run jekyll serve, which launches a web server and auto-regenerates your site when a file is updated.
To add new posts, simply add a file in the _posts directory that follows the convention YYYY-MM-DD-name-of-post.ext and includes the necessary front matter. Take a look at the source for this post to get an idea about how it works.
Jekyll also offers powerful support for code snippets:
defprint_hi(name)puts"Hi, #{name}"endprint_hi('Tom')#=> prints 'Hi, Tom' to STDOUT.
Check out the Jekyll docs for more info on how to get the most out of Jekyll. File all bugs/feature requests at Jekyll’s GitHub repo. If you have questions, you can ask them on Jekyll Talk.